Learning to hem pants is easy with the right tools and materials.
You can even get a professional finish.
This guide will teach you the basics, like measuring and sewing the hem.
You'll learn how to create a perfect pants hem from start to finish.
Whether you're hemming dress pants, khakis, or jeans, the steps are similar.
The hem allowance varies, though.
Dress pants and khakis usually need 1 inch, while jeans need 1/2 inch.
By following this guide, you'll learn to hem pants like a pro.
Practical chapters
- Key takeaways
- Essential tools and materials for hemming pants
- Taking measurements for your pants hem
- Preparing your pants for hemming
- Creating the perfect pants hem fold
- Basic hand-sewing techniques for hemming
- Machine sewing your pants hem
- Professional tips for different fabric types
- Troubleshooting common hemming problems
- Adding professional finishing touches
Key Takeaways
- Measuring and marking the hemline accurately is crucial for a professional finish in pants hem.
- The standard hem allowance for dress pants or khakis is typically 1 inch, while for jeans, it's generally 1/2 inch, which is essential to know when hemming pants.
- Using the right tools and materials, such as a sewing machine or needle and thread, can make the hemming pants process easier and more efficient.
- Blind hem stitches are recommended for dress pants to avoid visible stitching on the outside of the fabric, which is an important consideration in a beginner's guide to hemming pants.
- With practice, you can master the art of hemming pants and create a professional-looking pants hem, which is the ultimate goal of this beginner's guide to pants hem.
- Hemming pants can be completed by hand if a sewing machine is not available, with 100% of the process possible to complete manually, making it accessible to everyone.
- Average time taken to sew a hem with a sewing machine is less than one minute, making it a quick and easy process to hem pants.
Essential Tools and Materials for Hemming Pants
To get a professional-looking hem, you need the right tools and materials.
A measuring tape is key for accurate measurements.
You'll also need pins, an iron, and an ironing board for a crisp fold.
For sewing, a needle and matching thread are essential.
Here's a list of what you'll need for hemming pants:
- Pants that are too long
- Pins
- Iron and ironing board
- Scissors or rotary cutter and mat
- Tailor's chalk
- Needle and matching thread
- Tape measure or hem gauge


Measuring with a tape is crucial for a good fit.
You'll also need a seam ripper and hand-sewing needles for adjustments.
With these tools, you're ready to make a perfect hem.
Taking Accurate Measurements for Your Pants Hem
To get a perfect pants hem, you need to measure right.
Just follow the steps:
- Use a measuring tape to find the pants' length. Turn your pants inside out and measure 2 inches above the fold line to set the hemline.
- Measure the pants' length with a tape to make sure the hem is even. The hemline is the folded edge. It's key to get it just right.
- Use tailor's chalk to mark the hemline 2 inches above the fold line.
Here are some tips for measuring:
- Use a flexible measuring tape for accurate measurements.
- Measure the pants inside out to avoid mistakes.
- Mark the hemline with tailor's chalk for a clear line.
By following these steps, you'll get accurate measurements for your pants hem.
Remember to use a measuring tape and mark the hemline with tailor's chalk.
This will give you a professional-looking hem that's even and symmetrical.
Preparing Your Pants for Hemming
To start hemming pants, you need to prepare the fabric first.
This means unpicking the original hem with a seam ripper and pressing the fabric to get rid of creases.
Be careful not to harm the fabric around the hem.
Use a seam ripper to carefully cut the stitches, starting from the outside of the hem.
After removing the original hem, press the fabric next.
Use a hot iron and a press cloth to avoid scorching or making the fabric shiny.
This step is key for a smooth finish, which is important for delicate or dark-colored fabrics.
Pressing also helps remove wrinkles, making it easier to work with.
Before you start hemming, think about the fabric type.
Different fabrics need different handling, and some might need extra care.
For example, wool gabardine or thick fabrics might need a bulky seam jumper to make sewing easier.
Here are some tips for preparing your pants for hemming:
- Use a press cloth to prevent scorching or creating a sheen on the fabric
- Unpick the original hem carefully to avoid damaging the surrounding fabric
- Press the fabric to remove wrinkles or creases
- Consider the type of fabric you're working with and adjust your approach
By following these steps and tips, you can prepare your pants for hemming and get a professional finish.

Take your time and work carefully, paying extra attention to unpicking the original hem and pressing the fabric.
With the right techniques and tools, you'll create a high-quality hem that will make your pants look great and last longer.
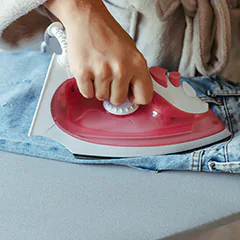
Creating the Perfect Pants Hem Fold
To get a professional look, making the perfect pants hem fold is key.
You need to fold and press the hem to get a crisp line.
Start by folding the bottom edge up by 1 inch and pressing it.
This will give you a sharp crease.
When you fold the hem, think about how it will look.
A good fold can really change how your pants look and fit.
Use an iron and ironing board to press the hem.
Make sure to press gently to not hurt the fabric.
Here are some tips for the perfect pants hem fold:
- Use a ruler or measuring tape to mark the hemline, about 3/4 inch from the shoe heel.
- Turn the bottom edge up by 1 inch and press for a sharp crease.
- Press the hem with a hot iron, using gentle pressure to avoid damage.
By following these steps and using the right techniques, you can get a perfect pants hem fold.
Receive the best offers for your home, negotiated for you
Unsubscribe anytime. We promise, no misused or sold emails, we hate unsolicited mailings.Remember to press the hem for a crisp fold.
Think about how the pants will look when you fold the hem.
With practice and patience, you can get the hang of it.
| Technique | Description | Benefits |
|---|---|---|
| Pressing Hem | Using a hot iron to press the hem | Crisp fold, professional finish |
| Folding Hem | Folding the hem to create a sharp crease | Sharp crease, professional appearance |
| Pants Hem Fold | Creating a fold that affects the overall appearance of the pants | Professional finish, improved fit |
Basic Hand-Sewing Techniques for Hemming
To get a professional-looking hem, you need to learn basic hand-sewing skills.
The blind hem stitch is key for a nearly invisible finish.
Start by threading a needle with polyester thread and tying a knot at the end.
This method is perfect for a clean hem.
Choosing the right stitches is vital for sewing. For hems, the blind hem stitch is a top pick.
To do it, insert the needle at a 45-degree angle, then bring it back up about 1/4 inch away.
This makes a small, almost invisible stitch.
Keep repeating this along the hemline for a strong hem.
Here are some tips for hand-sewing hems:
- Use a thimble to protect your fingers from the needle
- Keep your stitches small and evenly spaced
- Use a matching thread color to blend in with the fabric
- Iron the hem as you go to create a crisp fold
Mastering these hand-sewing techniques will help you make professional hems.
Whether you're altering clothes or sewing a new item, a well-made hem is crucial.
With practice, you'll get better at the blind hem stitch and other sewing skills.
This will let you take on more sewing projects with confidence.
Machine Sewing Your Pants Hem
Using a sewing machine to hem pants is quick and efficient.
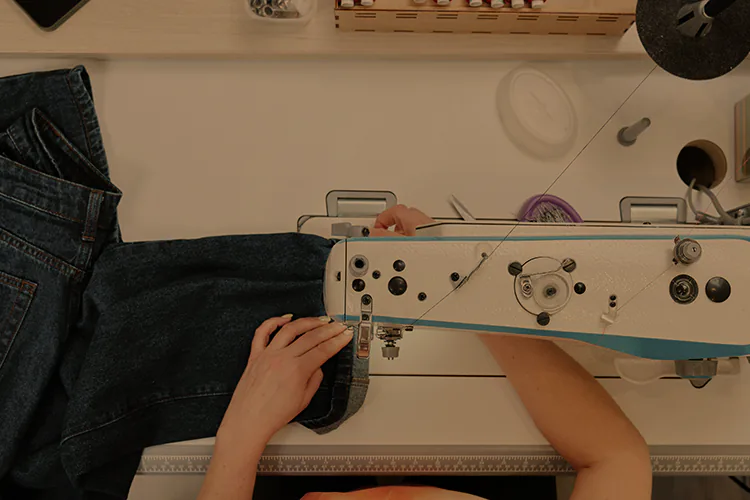
First, set your machine to a straight stitch.
This is best for a machine sewing hem. The stitch length should be between 2.5 and 3, up to 3.5 for stretchy fabrics or zigzag stitch.
For smooth sewing, remove all pins before the needle reaches them.
Stitch ⅛ to ¼ inch from the top fold line of the hem.
Here are some tips for machine sewing your pants hem:
- Use a 1 ¼ inch seam allowance, with measurements of ½ inch for the first fold and ¾ inch for the second fold.
- Ironing is crucial for successful hem creation, so make sure to press your pants before and after sewing.
- For medium to heavy fabrics, a topstitched machine hem is a suitable technique.
By following these tips and using your sewing machine, you can achieve a professional-looking hem on your pants.
Always use a straight stitch and remove pins as you sew for a smooth and efficient process.
| Seam Allowance | First Fold | Second Fold |
|---|---|---|
| 1 ¼ inch | ½ inch | ¾ inch |
Professional Tips for Different Fabric Types
When you're hemming fabrics, knowing the type is key.
Delicate fabrics like silk or chiffon need extra care to avoid damage.
For these, use a blind hem stitch and don't stretch the fabric.
For fabrics like cotton or linen, a standard hem works well.
But, adjust the stitch length and tension based on the fabric.
Here are some tips for different fabrics:
- Use a narrow hem allowance for delicate fabrics, such as 1/4 inch.
- Use a wider hem allowance for thicker fabrics, such as 1-2 inches.
- Use a serger or overlock machine to finish the hem edge for knit fabrics.
- Use a blind hem stitch for invisible hems on delicate fabrics.
By following these tips, you can get a professional finish on various fabrics.
Always test your stitches on a scrap before starting your project. This ensures the best results.
| Fabric Type | Hem Allowance | Stitch Type |
|---|---|---|
| Delicate fabrics (silk, chiffon) | 1/4 inch | Blind hem stitch |
| Thicker fabrics (cotton, linen) | 1-2 inches | Standard hemming technique |
| Knit fabrics | 1/4 inch | Serger or overlock machine |
Troubleshooting Common Hemming Problems
When you're hemming pants, you might run into issues like puckering or uneven hems.
These problems can be annoying, but there are solutions.
To stop puckering, try a blind hem stitch and adjust your sewing machine's tension.
To fix uneven hems, measure and pin the hem correctly before sewing.
Cutting off a bit of fabric, about 1/8-1/4", can also prevent fraying.
Here are more tips to solve common hemming issues:
- Use a fine, sharp hand-sewing needle to prevent uneven stitches.
- Use a double strand of thread for added strength and to prevent breakage.
- Iron the hem flat to ensure smooth topstitching of the hemline.
By using these tips, you can avoid common hemming problems and get a professional-looking hem.
Always choose high-quality materials and take your time sewing for the best results.
Adding Professional Finishing Touches
To get a professional look, details matter a lot.
Topstitching is a key technique. It involves sewing a straight line along the hem's edge. This makes the hem look clean and polished.
For topstitching, keep your stitches even and straight.
Use a sewing machine to adjust the stitch length.
Also, pick a thread that matches the fabric's color for a seamless finish.
Here are some tips for professional finishing:
- Use a basting stitch to hold the hem before topstitching.
- Press the hem to make it crisp.
- Use a tailor's ham and sleeve roll for better seam pressing.
By following these tips and using the right techniques, you can get a professional finish.
This will make your hem look neat and polished.
Take your time and be patient. Professional finishing makes a big difference in your garment's look.
| Technique | Description | Benefits |
|---|---|---|
| Topstitching | Sewing a straight line along the edge of the hem | Creates a clean and polished look |
| Basting stitch | Securing the hem in place before topstitching | Helps to create a consistent stitch length |
| Pressing | Creating a crisp fold in the hem | Helps to create a professional finish |
Conclusion: Mastering the Art of Hemming Pants
Hemming pants is a skill that saves time and money. It also ensures your pants fit perfectly.
By following the steps in this article, you're getting closer to being a pro at hemming.
Always measure carefully and prepare your pants well. Try out different stitching methods to see what works best for your fabric. This will help you get the best results.
With time and practice, you'll get better at hemming. If you face any problems, don't hesitate to ask a professional tailor for help. They can guide you to achieve the perfect hems you want.
Keep your sewing tools sharp and your measurements accurate.
Stay consistent with your technique!
With these habits, you'll soon master the art of hemming pants.
Happy sewing!
FAQ
Q: What essential tools and materials do I need for hemming pants?
A: You'll need a measuring tape, pins, and an iron. Also, scissors, tailor's chalk, a needle, and matching thread. Don't forget a tape measure or hem gauge.
Q: How do I accurately measure and mark the hemline?
A: First, measure the hemline. Then, use tailor's chalk to mark the fold. Make sure to use a measuring tape and follow the steps carefully.
Q: How do I prepare the fabric before hemming?
A: Start by unpicking the original hem. Then, press the fabric to remove any creases. Use a seam ripper and iron for a smooth finish.
Q: What is the best way to create a perfect hem fold?
A: Folding and pressing the hem is key. Use an iron and ironing board to get a crisp fold.
Q: What hand-sewing techniques should I use for hemming?
A: The blind hem stitch is essential for hemming pants. Use a needle and thread for a nearly invisible hem.
Q: How can I use a sewing machine for hemming pants?
A: Machine sewing is quick and efficient. Set up your sewing machine and sew a straight line for a professional finish.
Q: How do I handle delicate fabrics when hemming?
A: Delicate fabrics need special care. Follow professional tips to ensure a smooth hem without damaging the fabric.
Q: How can I troubleshoot common hemming problems?
A: Puckering and uneven hems are common. Adjust the tension on your sewing machine and use a blind hem stitch for a smooth finish.
Q: What finishing touches can I add to my pants hem?
A: Topstitching and sewing a straight line can add a professional touch. Use your sewing machine and adjust the stitch length for the best results.