As a DIY specialist who has repaired countless walls over the years, I can confidently say that drywall damage doesn't have to intimidate you.
Whether you're dealing with small nail holes, large gashes, or frustrating cracks that keep reappearing, I've developed reliable methods that deliver professional results every time.
Drywall repair is one of the most satisfying home improvement skills you can master. Not only will it save you hundreds of dollars in contractor fees, but it also gives you the confidence to tackle future wall damage without hesitation.
The techniques I'll share with you have been tested across various scenarios – from fixing accidental doorknob holes to repairing water damage and addressing structural settling cracks.
What makes my approach different is that I'll show you both traditional compound-based solutions and newer chemical alternatives, ensuring you have multiple options regardless of your skill level or available materials.
By the end of this guide, you'll understand exactly which method to use for each type of damage and how to achieve seamless, long-lasting results.
Practical chapters
- Small holes and nail holes — Traditional method
- Small holes and nail holes — Chemical alternative
- Medium holes — Patch technique
- Medium holes — Chemical-free patch technique
- Large holes — Backing strip method
- Large holes — Extensive damage
- Crack repair — Non-structural cracks
- Crack repair — Advanced
- Water damage — Surface
- Water damage — Extensive damage
- Textured wall — Matching peel texture
- Textured wall — Heavy texture matching
- Corner and edge — Inside corner
- Corner and edge — Outside corner
- Ceiling — Holes
- Ceiling — Water damage
- Anchor hole
- Torn paper
- Pro tips — Tool selection
- Pro tips — Compound selection
Prefer to Listen to my Advice on Drywall Repair?
Small Holes and Nail Holes (Under 1/2 inch)
Traditional Method with Lightweight Spackle
For tiny holes like those left by picture nails or small screws, I rely on lightweight spackle as my go-to solution.
This water-based compound dries quickly and sands smoothly, making it perfect for minor imperfections.
Here's my proven process:
- Clean the hole area with a damp cloth to remove any loose debris
- Using your finger or a small putty knife, press lightweight spackle directly into the hole
- Ensure the spackle is slightly overfilled and level with the wall surface
- Allow 15-30 minutes for complete drying
- Lightly sand with fine-grit sandpaper (220-grit works perfectly)
- Wipe clean with a tack cloth and apply matching paint
Chemical Alternative: All-in-One Repair Applicators
Modern repair applicators combine primer-enhanced spackle with built-in tools, offering incredible convenience.
These chemical formulations cure three times faster than traditional compounds and provide superior adhesion.
My application technique:
- Use the integrated sanding tip to clean the hole edges
- Squeeze the primer-enhanced compound directly into the cavity
- Smooth with the built-in putty knife, feathering edges outward
- Allow the accelerated drying time (typically 30-45 minutes)
- Sand lightly if needed and paint over the repair
Receive the best offers for your home, negotiated for you
Unsubscribe anytime. We promise, no misused or sold emails, we hate unsolicited mailings.Medium Holes (1/2 inch to 4 inches)
Mesh Patch Technique
For holes up to 4 inches, self-adhesive mesh patches provide excellent structural support when combined with joint compound.
My step-by-step approach:
- Clean and square up the hole edges with a utility knife
- Select a mesh patch that extends at least 1 inch beyond the hole on all sides
- Remove the backing and center the patch over the hole
- Apply joint compound in a crisscross pattern over the entire patch
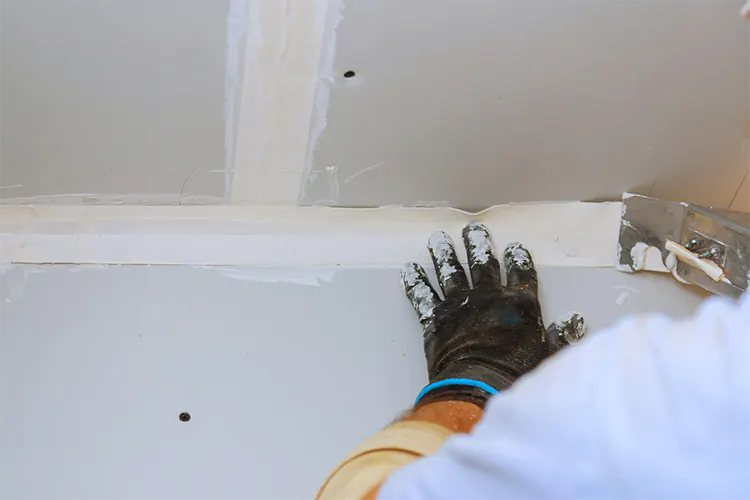
- Use a 6-inch putty knife to feather the edges, creating a gradual transition
- Allow 24 hours for complete drying
- Sand smooth with medium-grit sandpaper
- Apply a second coat if necessary, extending it wider than the first
- Prime and paint once fully cured
California Patch Method (Chemical-Free Traditional Approach)
This technique uses a piece of drywall with attached paper backing – essentially creating your own professional patch.
Here's how I execute it:
- Cut a piece of drywall 2 inches larger than your hole on all sides
- Score a square slightly larger than the hole on the back of the drywall piece
- Snap along the score lines and peel away the gypsum, leaving the paper intact
- Apply joint compound around the hole area on your wall
- Press the patch in place, with the paper backing overlapping the wall
- Smooth out air bubbles and excess compound
- Apply additional compound over the patch, feathering edges
- Sand, prime, and paint after complete drying
Large Holes (Over 4 inches)
Backing Strip Method with New Drywall
Large holes require proper structural backing to prevent future cracking and ensure durability.
My professional technique:
- Square up the hole using a drywall saw, making clean straight cuts
- Cut two pieces of wood backing strips (1x3 lumber works perfectly)
- Insert the backing strips horizontally behind the drywall
- Secure them to the existing drywall with 1¼-inch drywall screws
- Measure and cut a new drywall piece to fit the opening exactly
- Attach the patch to the backing strips with drywall screws
- Apply fiber mesh tape over all seams
- Cover with joint compound in three coats: tape coat, second coat, and finish coat
- Sand between coats for a smooth transition
- Prime and paint the entire repair area
Stud-to-Stud Replacement (For Extensive Damage)
When damage spans across wall studs, complete section replacement ensures maximum strength and longevity.
My approach for major repairs:
- Use a stud finder to locate the nearest studs on both sides of the damage
- Cut out the damaged section from stud center to stud center
- Remove all damaged drywall and any loose fasteners
- Install wooden cleats if needed for additional support
- Cut new drywall to match the original wall thickness (typically ½-inch)
- Secure the new piece directly to the wall studs
- Tape all seams with paper tape and joint compound
- Apply multiple coats, sanding between applications
- Texture-match if necessary before painting
Crack Repair Solutions
Settling Cracks (Non-Structural)
Most wall cracks result from normal house settling and can be permanently repaired with the right technique.
My proven method:
- Use a utility knife to widen the crack slightly, creating a V-shaped channel
- Clean out all loose material and dust
- Apply flexible acrylic caulk into the crack channel
- Smooth with a putty knife, removing excess material
- Allow to cure completely (usually 2-4 hours)
- Apply lightweight spackle over the caulk
- Sand smooth and paint
Recurring Cracks (Advanced Repair)
For cracks that keep reappearing, I use a combination approach that addresses both surface and underlying movement.
My comprehensive solution:
- Cut out a 2-inch wide strip along the entire crack length
- Apply mesh tape over the channel
- Use flexible joint compound specifically designed for crack repair
- Apply in thin, multiple coats rather than one thick application
- Consider using fiberglass mesh reinforcement for additional strength
- Prime with a high-quality primer before painting
Water Damage Repairs
Surface Water Damage
Light water damage often only affects the paper surface of drywall, making repair relatively straightforward.
My restoration process:
- Ensure the area is completely dry before beginning repairs
- Scrape away any loose or bubbled paper
- Sand the affected area to create a smooth surface
- Apply a stain-blocking primer to prevent bleed-through
- Use lightweight spackle to level any textural differences
- Sand smooth and apply additional primer if needed
- Paint with high-quality paint for best coverage
Extensive Water Damage
Severe water damage requiring drywall replacement demands careful attention to moisture control and mold prevention.
My systematic approach:
- Test the drywall firmness by pressing firmly – soft areas must be replaced
- Cut out all compromised drywall, extending at least 6 inches beyond visible damage
- Treat the area with antimicrobial solution
- Ensure complete drying before installing new drywall
- Use moisture-resistant drywall in high-risk areas
- Seal all edges and seams thoroughly
- Prime with mold-resistant primer before painting
Textured Wall Repairs
Matching Orange Peel Texture
Replicating existing wall texture requires patience and practice, but these techniques deliver excellent results.
My texturing method:
- Complete all patching and sanding as normal
- Apply primer to the repair area
- Thin down texture compound with water (roughly 10:1 ratio)
- Load a texture roller and practice on cardboard first
- Apply texture in random patterns, matching the surrounding wall
- Allow to dry completely before painting
Heavy Texture Matching
For heavily textured walls, hand-applied techniques work best.
My approach:
- Use a sea sponge dipped in thinned joint compound
- Dab and twist the sponge to create irregular patterns
- Vary pressure and angle to match existing texture
- Work in small sections, blending edges while wet
- Allow to cure fully before priming and painting
Corner and Edge Repairs
Inside Corner Damage
Corner damage requires special attention to maintain structural integrity and visual appeal.
My repair technique:
- Cut away all damaged drywall to create clean edges
- Install new corner bead if the original is damaged
- Apply joint compound in layers, building up gradually
- Use a corner trowel for perfectly straight edges
- Sand carefully to avoid creating ridges
- Prime and paint, paying attention to color matching
Outside Corner Bead Replacement
Damaged outside corners need complete bead replacement for proper protection.
My professional method:
- Cut through the damaged bead with a hacksaw
- Remove old fasteners carefully
- Cut new metal corner bead to fit the repair area
- Attach with drywall nails, ensuring proper alignment
- Apply joint compound over the bead in three coats
- Sand smooth and paint to match
Ceiling Drywall Repairs
Small Ceiling Holes
Ceiling repairs follow similar principles but require additional attention to gravity effects.
My overhead technique:
- Work with thicker consistency compound to prevent dripping
- Apply patches and compounds in thinner coats
- Use a wider putty knife for better control
- Allow extra drying time between coats
- Sand carefully to avoid creating visible ridges
Water-Damaged Ceilings
Ceiling water damage often indicates ongoing moisture issues that must be addressed first.
My comprehensive approach:
- Identify and fix the moisture source before any repairs
- Test ceiling firmness – replace any soft sections immediately
- Use moisture-resistant materials for all repairs
- Apply stain-blocking primer to prevent discoloration
- Consider professional help for extensive damage
Advanced Repair Techniques
Drywall Anchor Hole Repair
Oversized anchor holes require special techniques for proper restoration.
My proven method:
- Remove all anchor debris from the hole
- Use a mesh patch sized appropriately for the hole
- Apply multiple thin coats of joint compound
- Build up the repair gradually to match wall thickness
- Sand smooth and prime before painting
Torn Paper Repair
Paper tears require careful preparation to prevent compound failures.
My restoration process:
- Remove all loose paper completely
- Sand the exposed gypsum lightly
- Apply a high-quality primer to seal the surface
- Use multiple thin coats of joint compound
- Sand between coats for optimal smoothness
- Prime again before final painting
Professional Tips for Perfect Results
Tool Selection and Maintenance
Quality tools make a significant difference in repair outcomes.
I recommend investing in:
- High-grade putty knives (4-inch, 6-inch, and 12-inch)
- Fine-grit sandpaper
- Sanding blocks
- Quality brushes for primer and paint application
- Dust masks and protective gear
Compound Selection Guide
Different compounds serve different purposes:
- Lightweight spackle:
Best for small holes and quick repairs - Pre-mixed joint compound:
Ideal for larger patches and multiple coats - Quick-set compound:
Perfect for thick applications and fast curing - Flexible compounds:
Essential for crack repairs in settling homes
Timing and Patience!
Rushing drywall repairs almost always leads to visible results.
I always:
- Allow complete drying between coats
- Sand lightly between applications
- Use multiple thin coats rather than single thick applications
- Test texture matches on hidden areas first
As a conclusion
Mastering drywall repair transforms you from a homeowner who dreads wall damage into someone who confidently tackles any surface imperfection.
The techniques I've shared represent years of refined experience, combining traditional methods with modern materials for optimal results.
Remember that patience and practice are your greatest allies – each repair you complete builds your skill set for the next challenge.
Whether you choose natural spackle compounds or advanced chemical formulations, the key lies in proper preparation, methodical application, and allowing adequate curing time.
With these proven techniques in your toolkit, you'll never again need to live with unsightly wall damage or expensive contractor bills.